
If your internet feels slow, drops during video calls, or works fine in one room but not another, you may be dealing with signal interference. If you’re searching how to test WiFi interference on laptop, the answer is simple: check signal strength, scan nearby networks, monitor channel congestion, test speed in different spots, and isolate nearby devices. You do not need special equipment. Your laptop already has the tools. When you test the right way, you can tell whether the problem is interference, weak signal, router placement, or your internet provider. Most people guess. Testing removes the guesswork.
I’ve been troubleshooting home and office networks for over 25 years. In most cases, WiFi interference was the real issue, not the internet plan. Let me walk you through it clearly, step by step.
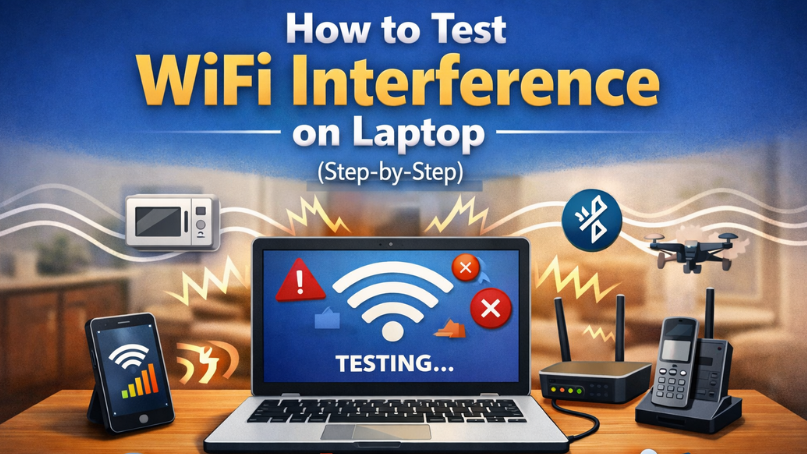
What Is WiFi Interference (And Why It Matters)?
Before we test anything, you need to understand what you’re looking for.
WiFi interference happens when other signals, devices, or physical barriers disrupt your wireless connection. Your router sends radio waves to your laptop notebook. If something blocks or competes with those waves, your connection weakens.
Interference can come from:
- Other WiFi networks
- Microwaves
- Bluetooth devices
- Thick walls
- Metal objects
- Too many connected devices
When interference is strong, you may see:
- Slow download speeds
- High ping during gaming
- Dropped Zoom calls
- Buffering on streaming
- WiFi disconnecting randomly
Testing interference helps you fix the right problem instead of upgrading your plan for no reason.
Step 1 – Check Your Signal Strength on the Laptop
This is the first and easiest test.
On Windows
Click the WiFi icon in the bottom right corner. Look at the signal bars. Then:
- Open Settings
- Click Network & Internet
- Select WiFi
- Click Hardware properties
You’ll see signal quality as a percentage.
On Mac
Hold the Option key and click the WiFi icon at the top. Look at RSSI and Noise levels.
RSSI closer to -30 is strong. Around -70 is weak.
If your signal is weak near the router, you likely have interference or router placement issues.
Why this matters: Weak signal is often confused with slow internet. They are not the same.
Step 2 – Run a Speed Test in Different Locations
Now we test stability.
Go to a speed test website and run a test:
- Near the router
- One room away
- Two rooms away
Write down the results.
If speed drops sharply as you move, walls or materials may be blocking signal. If speeds fluctuate even near the router, interference or channel congestion is likely.
I once helped a family in Texas who upgraded from 200 Mbps to 1 Gig. The issue was not speed. It was interference from six neighboring networks using the same channel.
Testing location tells you what is happening physically.
Step 3 – Scan Nearby WiFi Networks
This is one of the most important steps when learning how to test WiFi interference on a laptop.
On Windows (Advanced Command)
Open Command Prompt and type:
- netsh wlan show networks mode=bssid
This shows all nearby networks and their channels.
On Mac
Use Wireless Diagnostics (built-in tool). Open Spotlight and search “Wireless Diagnostics.”
Look for:
- How many networks use your channel
- Signal strength of nearby networks
- Overlapping channels
If many networks use channel 6 on 2.4 GHz, congestion is happening.
Why this matters: Channel overlap is one of the top causes of wireless interference in US apartments and suburban neighborhoods.
Step 4 – Check 2.4 GHz vs 5 GHz Band
Most routers use two bands:
- 2.4 GHz (longer range, more crowded)
- 5 GHz (faster, shorter range)
Connect your laptop to 5 GHz if you are close to the router. Run a speed test again. If performance improves, interference on 2.4 GHz is likely.
In many US homes filled with smart devices, 2.4 GHz gets congested fast.
Step 5 – Turn Off Nearby Devices (Isolation Test)
This step shows you if household electronics are interfering. Turn off:
- Microwave
- Bluetooth speakers
- Baby monitors
- Smart cameras
- Cordless phones
Test WiFi again.
If performance improves, you found your interference source.
I worked with a remote worker in California whose Zoom calls froze daily. The problem was a microwave running during lunch meetings. Simple fix: move the router away from the kitchen.
Isolation testing gives clear answers.
Step 6 – Use Built-In Network Diagnostics
Both Windows and Mac offer basic diagnostics.
Windows Network Troubleshooter
Go to Network Settings and run Troubleshoot. It checks adapter issues and signal problems.
Mac Wireless Diagnostics
It provides signal-to-noise ratio readings.
Signal-to-noise ratio (SNR) above 25 is stable. Below 15 may cause drops.
This tells you if interference noise is high.
Step 7 – Test for Physical Obstruction
Walk around your home with your laptop open. Watch signal bars.
Notice where it drops sharply.
Common blockage areas:
- Behind large metal shelves
- Near thick brick walls
- Behind mirrors
- Near aquariums
If signal drops in specific spots, physical materials are blocking WiFi.
This step is simple but powerful.
Step 8 – Check for High Ping or Packet Loss
Sometimes interference does not show in speed tests. It shows in stability.
Open Command Prompt and type:
- ping google.com -t
Watch response times.
If ping spikes randomly or times out, interference or congestion is likely.
Stable ping should stay consistent.
Gamers in the US often mistake high ping for slow internet. Many times it is WiFi interference.
Step 9 – Restart Router and Test Again
This sounds basic, but routers can auto-select crowded channels.
- Restarting forces a new channel scan.
- After reboot, test speed and stability again.
- If performance improves, channel congestion was part of the problem.
How to Confirm It Is Interference (Not Your ISP)
Here’s how you know:
- Ethernet connection works perfectly
- WiFi struggles
- Speed improves when close to router
- Performance changes based on time of day
If Ethernet is stable, your internet provider is likely not the issue.
This distinction saves money and frustration.
Real-World Example from Experience
A small business in Florida complained about daily WiFi drops. They planned to switch providers.
Testing showed strong internet speed via cable. WiFi scan revealed 18 nearby networks on the same 2.4 GHz channel.
We switched channels and added a mesh node. Drops disappeared.
The total cost was less than upgrading the internet plan.
Testing interference avoids expensive mistakes.
When You Should Upgrade Equipment
Testing tells you when an upgrade makes sense. Upgrade if:
- Your router is older than 5 years
- You have over 20 connected devices
- Your home is over 2,500 square feet
- You use WiFi 6 or WiFi 7 capable devices
Newer routers handle congestion better and support cleaner channels.
In 2026, more homes are adopting WiFi 6E and WiFi 7. These use higher frequencies. They are faster but more sensitive to obstacles.
Testing first helps you decide wisely.
Future Trends in WiFi Interference
Wireless congestion will increase in the US.
More smart homes mean more devices competing for bandwidth.
Higher frequency WiFi will reduce congestion but increase sensitivity to walls.
Mesh systems will become standard in larger homes.
Knowing how to test WiFi interference on a laptop will stay useful for years.
Quick Testing Checklist
If you want a fast process, follow this:
- Check signal strength
- Run speed tests in multiple rooms
- Scan nearby WiFi networks
- Switch bands
- Turn off nearby electronics
- Test ping stability
- Compare Ethernet vs WiFi
This method works in most homes.
Common Mistakes People Make
People often:
- Upgrade internet speed without testing
- Place router inside cabinets
- Ignore channel congestion
- Blame laptop hardware first
Testing prevents wrong assumptions.
Final Thoughts – Take Control of Your WiFi
If you searched how to test WiFi interference on laptop, you now have a clear, step-by-step plan.
Interference is common. It is fixable. It is often misunderstood.
Most problems come from congestion, placement, or nearby devices. Not from your internet provider.
Start simple. Test signal strength. Scan channels. Isolate devices. Move your router.
Small changes can improve your WiFi more than expensive upgrades.
Take 20 minutes today and run these tests. You’ll understand your network better than most people and you’ll stop guessing.
If this guide helped, bookmark it for future troubleshooting. Your WiFi should work for you, not against you.